Build Your Own 3D Viewer on iOS in 10 Minutes Using Swift

What is Swift?
If you are a newbie, this will help you to create your simple 3D application in swift. Nowadays, as per statistics, swift has been more popular than Objective C as it simple and easy to understand.
Before starting with the creation of new own 3D application, let’s get familiar with Swift. Those who already know Swift can directly jump to the section titled “Steps to create a 3D application”.
Swift is an auxiliary programming language developed by Apple Inc for iOS and OS X. Swift is raptness of many languages such as C, Objective C, Javascript, etc. Swift is built on the open-source LLVM compiler framework and it has been included in Xcode(IDE) since version 6.
Features / Advantages of Swift
It is more readable because of its clean syntax, which makes it easier to read, write and understand.
- The number of code lines on Swift is a lot fewer than for Objective-C
- No need to purchase the license as it is Open Source
- Less memory-consuming
- It is faster
- Multiple return values and Tuples
- Structs which support extensions, methods, and protocols
- Powerful error handling
Steps to Create 3D Cube
Step 1:
- Using Xcode create a “Single View Application” project and from “Object library” import a SCNView type object to view controller.

Fig 1. Adding SCNView
Step 2:
- Import the SceneKit module to viewcontroller.swift and link previously imported SCNView to ViewController.swift.

Fig 2. Linking SCNView
Step 3: Render the 3D model
- Initiate instance of the scene.
- Create cube from SCNBox of size 0.1*0.1*0.1. Set color to created box geometry.
- From box geometry, create SCNNode and add it to a scene for rendering.
- To allow user interaction, set allowsCameraControl to true.
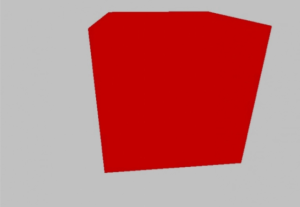
Finally, build the solution, it will show red cube and you perform pan, rotate, zoom operations.

Fig 3. Red Color 3D Cube
Reference Code:
Please refer the code for more details,
ViewController.Swift
import UIKit
import SceneKit
class ViewController: UIViewController {
@IBOutlet weak var mySceneView: SCNView!
override func viewDidLoad() {
super.viewDidLoad()
mySceneView.allowsCameraControl = true
//Create instance of scene
let scene = SCNScene()
mySceneView.scene = scene
//Add cube to scnview
AddCubeToScene()
}
override func didReceiveMemoryWarning() {
super.didReceiveMemoryWarning()
// Dispose of any resources that can be recreated.
}
func AddCubeToScene()
{
//Create a box of size 0.1 * 0.1 * 0.1
let myBox = SCNBox(width: 0.1, height: 0.1, length: 0.1, chamferRadius: 0)
myBox.firstMaterial?.diffuse.contents = UIColor.red
myBox.firstMaterial?.isDoubleSided = true
//Create SCnnode of from geometry and specified its position
let cubeNode = SCNNode(geometry: myBox)
//Add created scnnode to scene
mySceneView.scene?.rootNode.addChildNode(cubeNode)
}
}
As SceneKit provides the rich set of API, there are many more CAD things for e.g. CAD File Viewer which could be done using Scene Kit.
If you enjoyed this post or need more information on 3D application with Swift.
For more queries regarding any of the above-mentioned topics, feel free to connect with us on our website https://prototechsolutions.com, or email us at info@prototechsolutions.com