Are you facing a problem of sharing our 3D models with someone who doesn’t have the required design software? You can share the model by converting it to an HTML document so that anyone can view it in the browser.
The WebGL Exporter does this for you. It exports your model to an HTML document that can be viewed in the browser. This html document can be shared easily with anyone whether that person has SolidWorks/Inventor/AutoCAD/Maya/Max installed on the machine or not.
WebGL Exporter For Revit® ( Version: 2.4, Updated Date: 25-Oct-2016)
The WebGL Exporter for Autodesk® Revit® exports the model to an HTML document that can be viewed in the browser. It exports the model to an HTML document that can be viewed in the browser. It supports both face-level and body-level colour. Option is provided to control the file size and quality by specifying precision value. Increasing precision value will increase the fineness and accuracy of the model as well as the file size. You can choose whether you want to tessellate at the body-level or facelevel. All the data is compressed which reduces the file size as much as possible
Now WebGL Exporter for Revit added new VR feature. \
Now WebGL/HTML models will get automatically embedded in selected template.
Versions Supported : WebGL Exporter works with Revit® 2013, 2014, 2015, 2016 and 2017 .
License Terms and Conditions:-
The license is tied to one piece of hardware (machine). Once activated this license cannot be transferred to another machine.
Your product activation key will be sent via email as soon as you complete the payment process.[/li_item][li_item icon=”fa-check”]The activation will require internet connection. The internet connection is required only once for activation.
If the machine is formatted for any reason, the license will have to be reactivated.
The license is perpetual only for the downloaded version on the hardware which it is activated. While the current policy is to allow the updates for free, this may change in the future.
While we will try to provide technical support, there are no committed warranties and support. We recommend that you evaluate our product to your satisfaction based on the free trials provided before making the purchase.
Version History | ||
| Version | Release Date | What’s new |
| 2.4 | 02/03/2017 | Feature: Added support for Virtual Reality (VR) headset compatible format. Now you use the exported WebGL on a VR headset such as Google Cardboard, Oculus Rift, Gear VR, HTC Vive and more. How to export model with VR: https://prototechsolutions.com/Live/virtual-reality-cad-plugins.html |
| 2.3 | 12/07/2016 | 1. Feature: Supports HTML templates. WebGL models will get automatically embedded in selected template. 2. Revit 2017 is now supported. |
| 1.3 | 10/08/2015 | 1. Greatly simplified license activation process. Please note: Existing customers who have already activated the product will have to contact our support to request for a key for reactivation after installing this update. |
| 1.2 | 04/14/2015 | 1. Supported Revit version 2016. |
| 1.1 | 11/14/2014 | 1. Fixed: User who have different local settings (e.g. comma character as decimal separator) can now export valid WebGL files. |
| 1.0 | 06/30/2014 | 1. Supports exporting Solid bodies. 2. Supports face level colors and body level colors. |
For activation please contact at: support@ProtoTechSolutions.com.
We are not supporting textures.
Demo
How To Use WebGL Exporter For Revit® :
Download and install WebGL Exporter plugin for Revit®.
Run Revit® and Load a model (part or assembly).
There’s a new panel under Add-Ins menu on ribbon bar named as ‘WebGL Exporter‘.
It contains following three menu items as shown in the image below.

A) Export
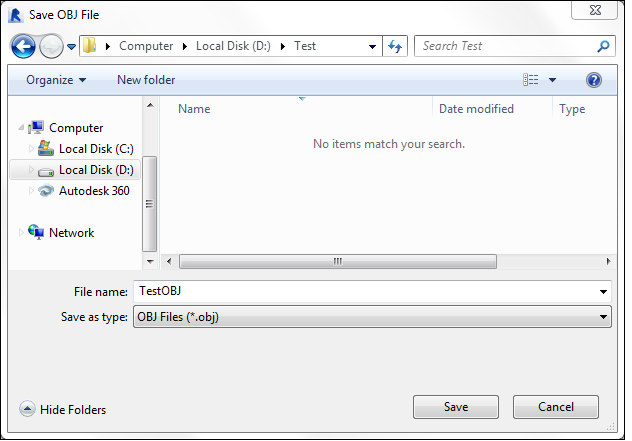
After clicking here, a ‘Save As‘ dialog will display on our screen.
A default file name will appear in the file name text box. You can edit this name.
Click Save button to export the current model to HTML document.

B) Preferences
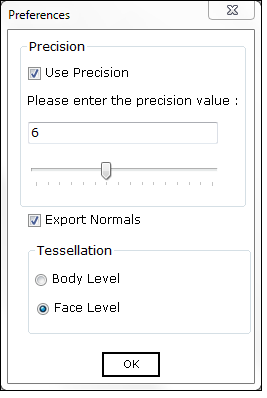
It contains following options as shown in the image.

Precision : You can control how accurately your model needs to be exported. If you need fine representation of the model, just check the “use Precision” check box and the slider will be enabled. You can slide and select the values from 0 to 15. Higher is the value, finer is the representation you will get and larger is the file size. Default is full precision.
Export Normals : You can select whether you want to export normals or not. Default is set to export normals.
Tessellation : You can choose from Body level and face level. Default is face level.
C) About
It displays the information about product. It provides facility to activate your product license at any time from this control. After exporting, an HTML file will be generated and it can be viewed in the browser.
This is how it looks in the browser.
To download the plugin, please Click Here
For any other query, please Contact Us


