Installation and Usage manual for 3D PDF Exporter Revit
- Double click on the installer (.msi file) downloaded from the website.
- The installation will be done after that.
- Open Revit and You can see “ProtoTech 3D PDF Exporter” in Add-In tab.
- There are three buttons :
1. Export: Export button will simply export the active view loaded on the Revit window.
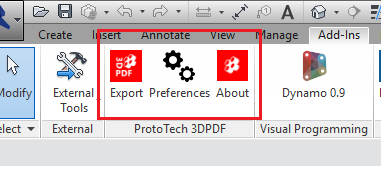
Fig 1. Buttons
2. Preferences: Preferences buttons opens up a dialog box which allows the user to manipulate settings for exporting the model.
- The user can control model quality and size
- Attach PDFs with 3D PDF
- Add 3D view in PDF template etc
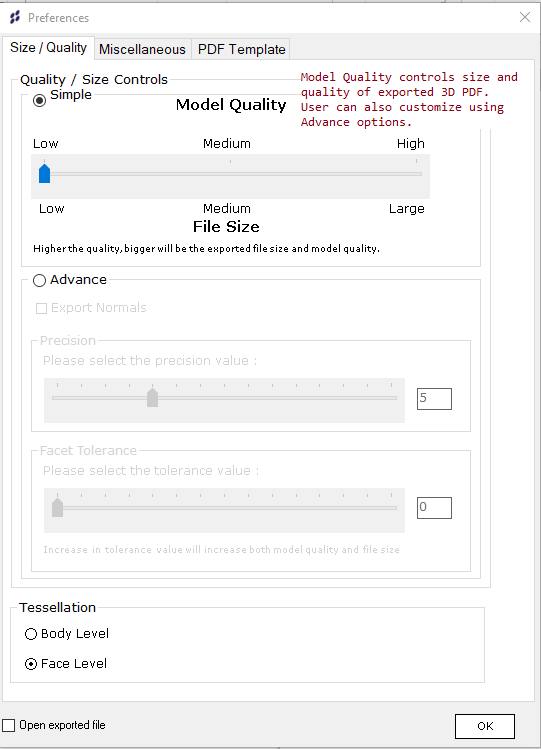
Fig 2. Preferences
3. About Us: About Us dialog box shows Product information, licensing details and contact information of technical support.
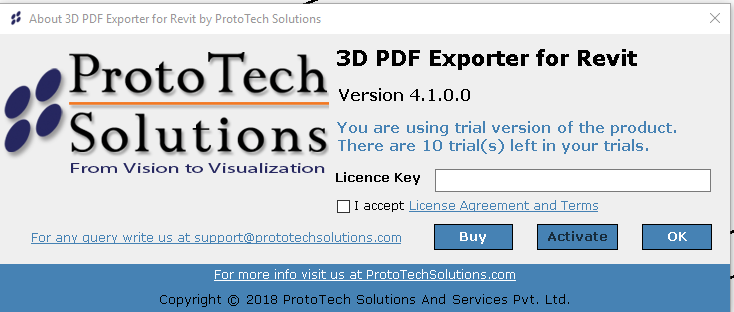
Fig 3. About Us
Note: Please make sure your internet connection is available while activating the license.
Please refer “License FAQ” section in the following link for more details,
Ref: https://prototechsolutions.com/product/3d-pdf-exporter-revit/
Author: Mahesh R
Contact us:
info@prototechsolutions.com
ProtoTech Solutions and Services Pvt. Ltd.
